
Campaigns with Links
In this section, you will learn how to set up users, templates, and a full campaign for the fictional company Favorite LLC from scratch. In this case, you will take on the role of the security administrator.
The fictional campaign will include three users: Peter Smith, John Brown, and Kathrine Collins.
Creating a Sender Profile
Making a sender profile for this campaign is very simple. Go to the SMTP page and click the button  .
.
You have delegated the domain favorite.secuchamp.com to your server and specified the domain when installing SECURITY CHAMPION, so use this domain to send emails.
Go to the Mail server page:
https://favorite.secuchamp.com/postfixadmin/
If you haven't changed the password after installing SECURITY CHAMPION, use:
Login: secuchamp Password: secuchamp
DON'T FORGET TO CHANGE THE PASSWORD!
After logging in, go to the Overview tab.
Click Create Mailbox at the bottom, fill in the fields, and click Create Mailbox.
You have created the address: brown.j@favorite.secuchamp.com
Now that you have an account, you can create an SMTP. The resulting SMTP should look like this:
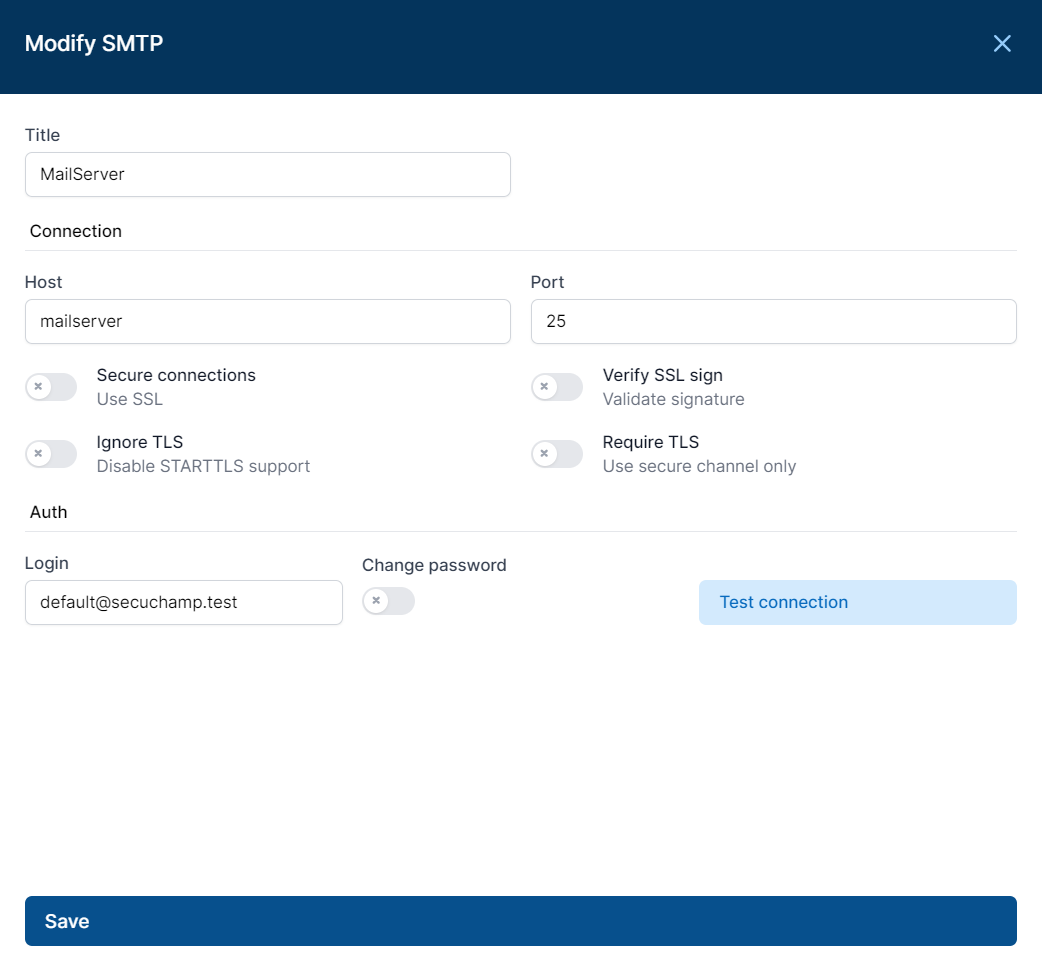
To test the connection, click Test Connection.
After specifying your settings, click Save.
Importing Employee Data
You already have a prepared CSV file with employee data. It looks like this:
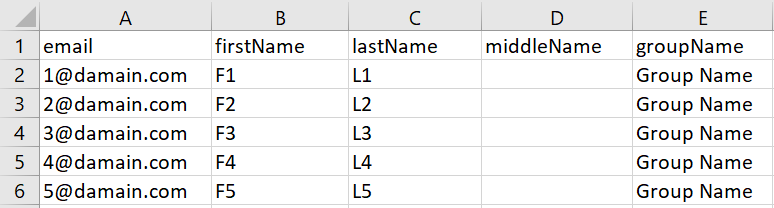
Now that you have a list of users, import them into SECURITY CHAMPION.
To add employees, go to the Employees page and click the button 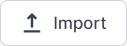
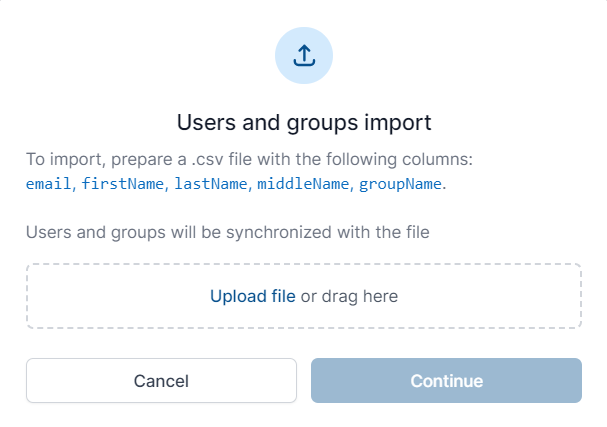
Click Upload File and select the file with employee data. Click Continue.
Click Import to upload the CSV file. Now you see that the users have been added automatically.
Adding a Phishing Domain
Go to Settings → Domains.
To add an additional domain, click the button 
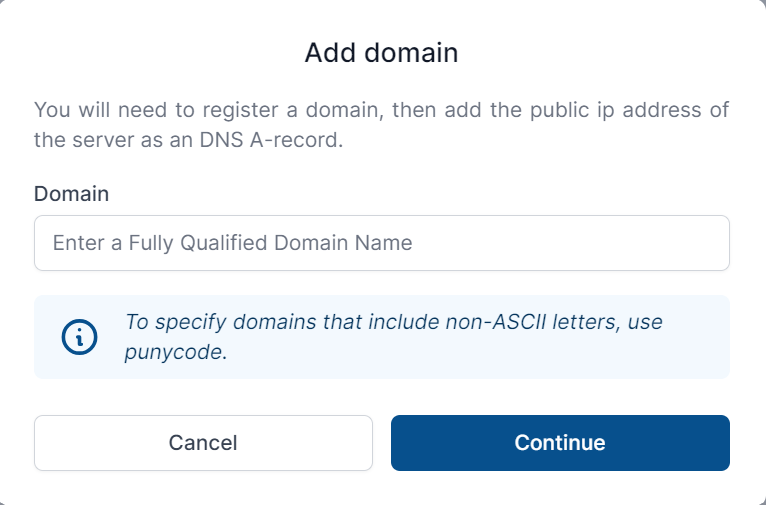
Insert your domain in the Domain field and click Continue.
Add the public server address as a DNS A record.
Creating a Site Template
You know that Favorite LLC has an email portal, so you should clone it for your target page.
Go to the Sites page and click the button .
To import a site via a URL, paste the link to the portal in the Capture URL field.
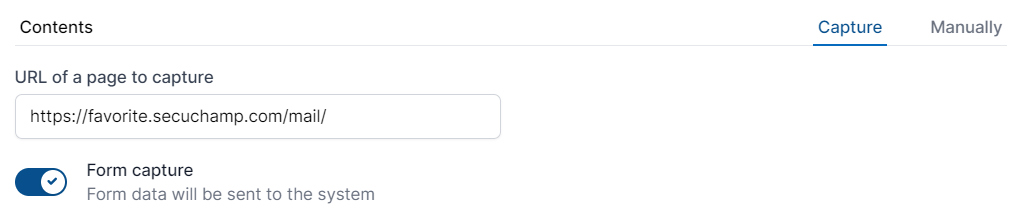
Do not forget to enable the Capture Forms function to collect the data entered into the form.
Click Save to start importing the page.
After the import is completed, the page will be added to the list of all sites.
Page Address
Specify the address to access the website.
Click the ⋮ button next to the site name and select Edit.
Go to URLs to access the phishing site.
In the drop-down list, select the domain added to SECURITY CHAMPION favorite.secuchamp.com and specify the path mail/.
Now the website will be accessible at: https://favorite.secuchamp.com/mail/
Save the changes and proceed to the next steps.
Creating an Email Template
To create a template for the Favorite campaign, go to the Emails page and click the button .
As part of the campaign, you will send emails from John Brown, the system administrator, using his name and email address in the From field:
John Brown<brown.j@favorite.com>
Create a simple template that suggests resetting a user's password. Use the following email subject:
Password reset for {{ user.email }}
You have used a regular expression. When the email is sent, the expression will contain the employee's email address.
This is one way SECURITY CHAMPION can personalize emails to individual employees to increase the open and click rates.
On the WYSIWYG tab, find the editor you can use to create your email: 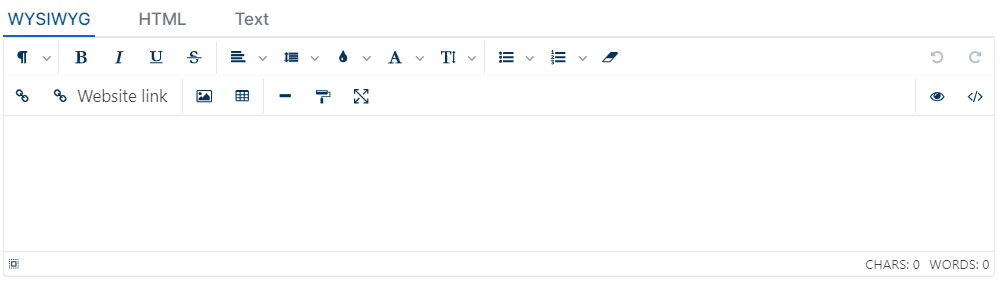
Let's use a simple template in this example campaign. Start by adding an email:
{{ user.firstName }} {{ user.middleName }},

The password for {{ user.email }} has expired. Please reset your password here.

Best regards,
IT Department, Favorite LLC
Now you need to add a phishing link. Highlight the word "here", open the Insert Site Link dialog box, and click the Link to Site (the chain icon) in the menu.
In the Link field in the dialog box, select the page you want to use and the link you have assigned to it. The Link Text field now contains the word "here".
The email is ready.
Make sure you have enabled the Track function and click Save.
Launching a Campaign
Now that everything is ready, launch the campaign!
To create a new campaign, go to Campaigns and click the button .
See the details of the settings here.
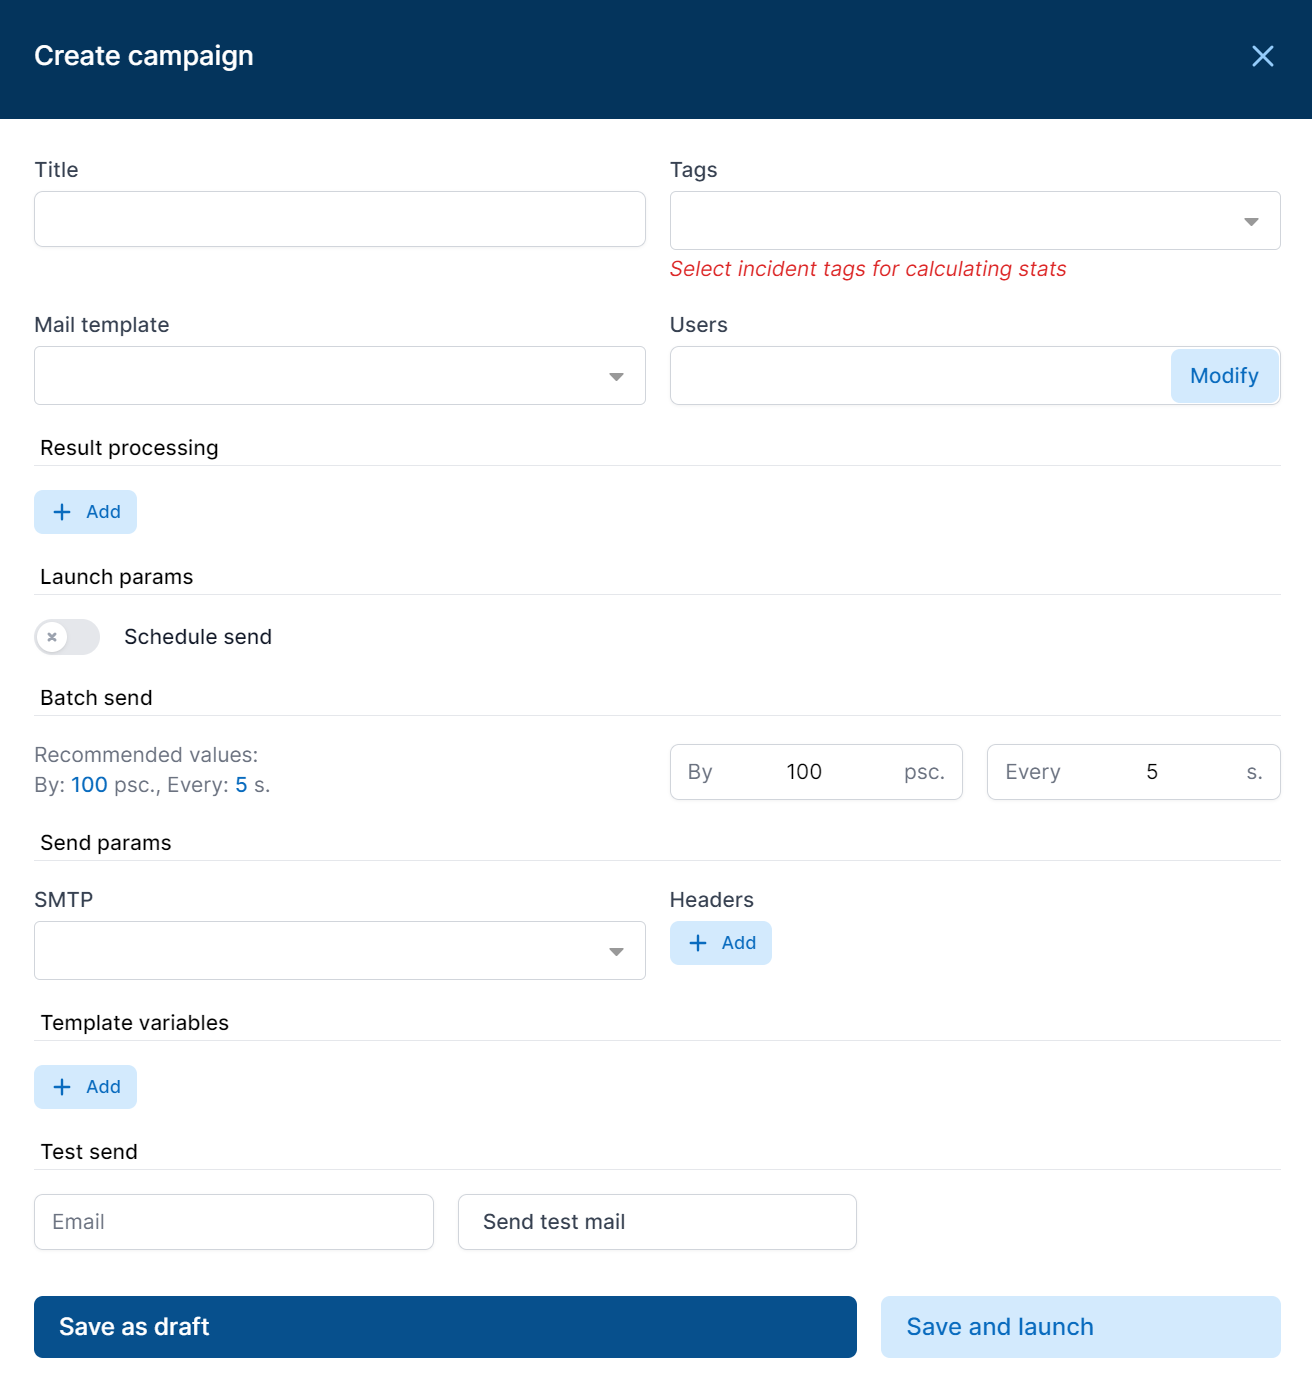
After all the settings are filled out, click Save and Launch to start sending emails immediately!
Viewing Results
After launching the campaign, go to the campaign results page. You will see in real time when the system sends emails and users open them or click links in the emails.
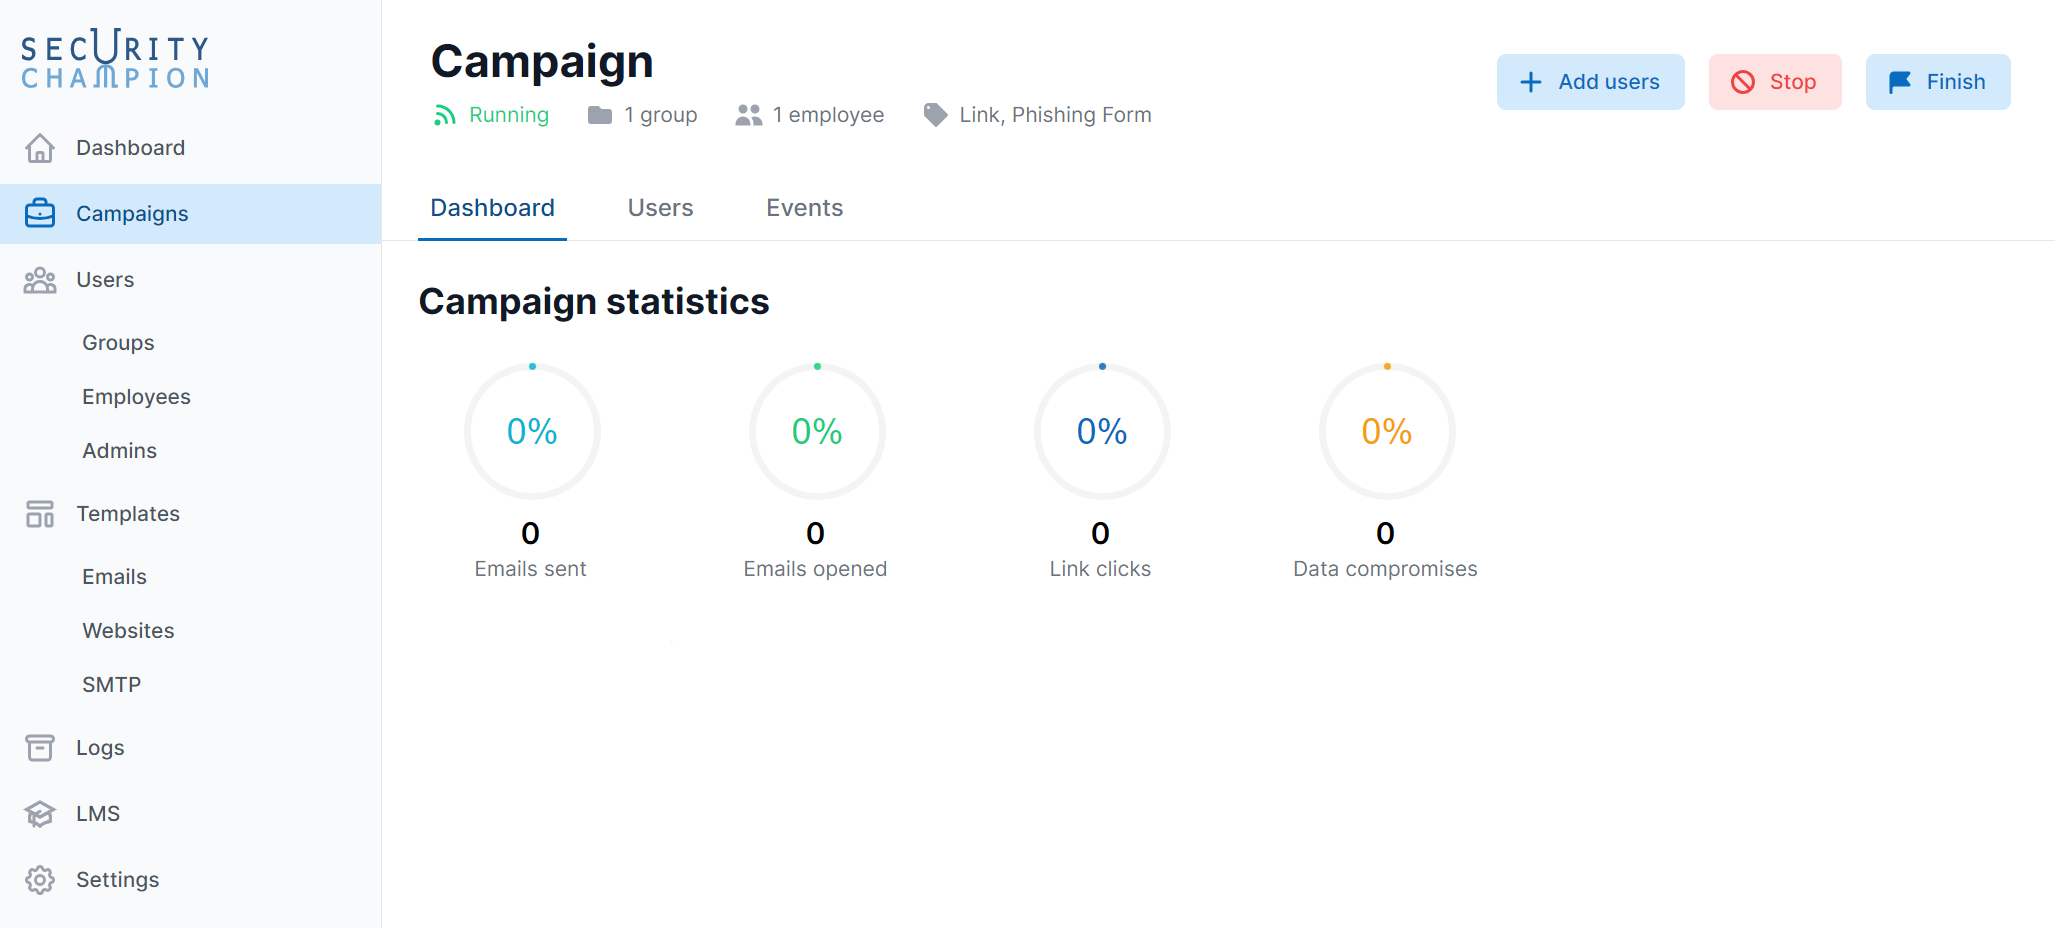
Congratulations on launching your first campaign!